A small intro
Although my main stack is far from this now, throughout my professional career I have had to work with the Windows Server stack, and the issue of secure RDP access has always been important. One of my favorite customers with Windows Server stack was a medium-size company in the financial sector, who’ve managed their custom software across multiple Windows Server environments, and their go-to solution for secure RDP access was Azure VPN. With all my love for Azure, their VPN (especially cert-based one, which required a lot of management overhead) was not the most user-friendly solution.
After some time, we’ve migrated to Tailscale, which has been a huge relief. Tailscale’s approach to zero-trust networking made it easy to manage access without the complexity of traditional VPNs - centralized policy and user management, multiple cool features and significantly lower pricing compared to Azure (especially after semi-retirement of Azure VPN Gateway Basic SKU.)
For a long time, I believed that there’s nothing that could get close to Tailscale’s simplicity and effectiveness for zero-trust RDP access. On July 1, 2025, Cloudflare announced their in-browser RDP solution (currently in open beta status), which immediately caught my attention, because I know that when CF release a solution, it’s going to be well-engineered and user-friendly (almost always). After reading the guide, I knew that it’s worth trying to automate and demonstrate to you.
So what do they offer?
Basically, as they state in the guide, “Browser-based RDP leverages Cloudflare Tunnel, which creates a secure, outbound-only connection from your RDP server to Cloudflare’s global network.”. If you’ve tried using Cloudflare Tunnels, you know that it’s a powerful thing offered at incredible scale for free (you get 1000 tunnels and 500 Access applications in a free Zero Trust plan).
At literally no cost (costs for this demo are $0, the only requirement is to own a domain - which I already do, the one where this domain is hosted), they offer:
- In-browser RDP access without the need for a VPN client
- Zero-trust authentication (multiple providers supported, I used One-time PIN) and access controls
- Up to 50 (!) users for free, while infrastructure targets (RDP servers) can be as high as account limits for associated resources, so the bottleneck (which arguably is a bottleneck, considering that we’re still talking about a free solution) is the “Applications count” limit (500 per account). If free tier isn’t enough, a paid plan without user limits starts at $7 per user per month for “Pay-as-you-go” (https://www.cloudflare.com/plans/zero-trust-services/). For comparison, Microsoft Entra Private Access ZTNA solution (which is more feature-rich, but anyway), starts at $12 per user per month with annual commitment, (there’s no option of “free tier” for this one), so in case where we have 40 users, it’s free vs $5760/year for a ZTNA solution.
That sounds too good to be true, right? Well, let’s put it to the test.
Setup
Why Terraform?
I chose Terraform for this demo due to a few reasons:
- I find it easier to have a bunch of config files, where I can pass a few input variables and quickly see the result
- If we’re talking about using Cloudflare in-browser RDP at scale, I hope that this demo will help you to have a foundation that you can build upon and customize for your specific needs (I strongly recommend against using this demo code in production without proper testing and validation)
- I like Cloudflare’s Terraform provider. After announcing their in-browser RDP solution, I was excited to see how well it can be integrated into existing Terraform workflows. Approach, implemented in this demo, can be reused with AWS, GCP, DigitalOcean, and other cloud / virtualization platforms that have Terraform providers.
Prerequisites:
- Azure account
- Cloudflare account with a registered domain
- Terraform (tested with
v1.12.1) - Azure CLI (tested with
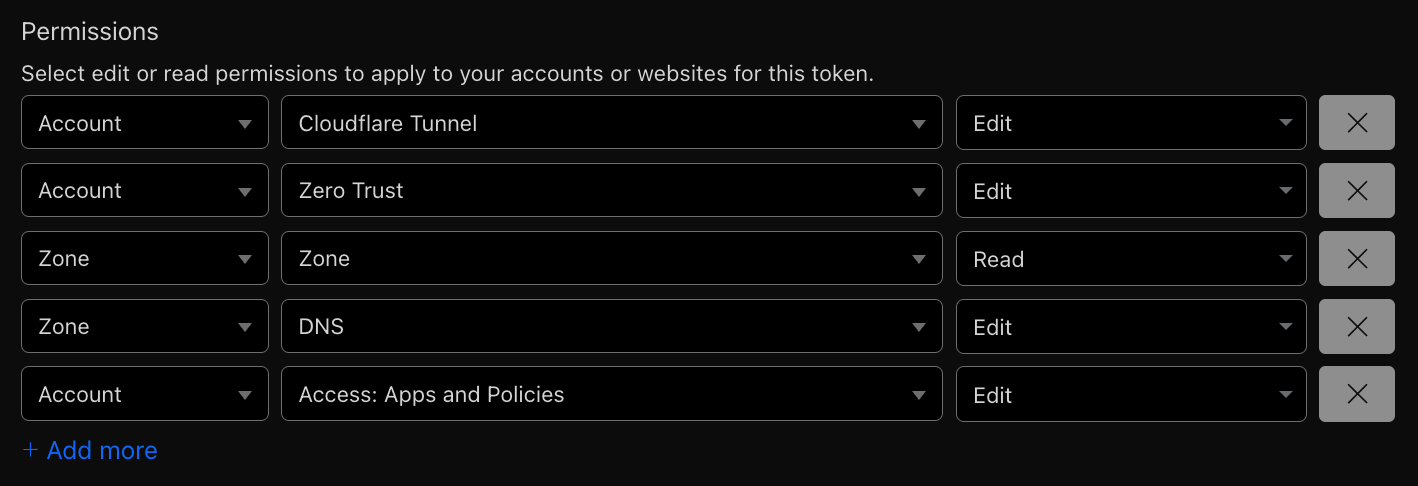
2.76.0), authenticated into your Azure Subscription (az account showto verify) - Cloudflare access token with the following permissions:
Preparing the environment
After cloning the repo, fill in the terraform.tfvars file with your Azure and Cloudflare credentials (see the terraform.tfvars.example file for reference). By default, configuration uses Azure storage account as Terraform backend (backend.tf file) - if you’re using a different backend (including local state, which is OK for a demo) you need to change it in the backend.tf file. If you prefer to stick with Azure storage account backend, you need to create a storage account and a container to use it - you can use az-tfstate-sa.sh script, located in the repo root, or create a storage account and a container manually. After creating the storage account and container, you need to update the backend.tf file with the correct values.
Run the terraform init command to initialize the Terraform working directory and download the necessary provider plugins, then run terraform apply to create the resources.
That’s how the infrastructure will look like once it’s provisioned:
flowchart LR
  User["User browser"] --> DNS["env.domain"]
  DNS --> Access["Cloudflare Access app (RDP)"]
  Access --> IdP["Identity provider (SSO)"]
  IdP --> Access
  Access --> Tunnel["Cloudflare Tunnel"]
  Tunnel --> Cloudflared["cloudflared on Windows VM"]
  Cloudflared --> VM["Windows VM (RDP 3389)"]

  subgraph "Azure"
    VNet["VNet"] --> Subnet["Subnet 10.0.1.0/24"]
    Subnet --> VM
    NAT["NAT Gateway"] --- Subnet
  end

  subgraph "Cloudflare Zero Trust"
    Access
    Tunnel
  end

  Tunnel ---|"routes 10.0.1.0/24"| Subnet
During deployment, VM is created and bootstrapped with a PowerShell script that installs cloudflared service and registers it with a tunnel token. At the end of deployment, you should see the URL to access the RDP-enabled Windows server in the output, as well as auto-generated username and password for the RDP access, so right after the deployment is complete, you can access the created VM using Cloudflare in-browser RDP. It works via Cloudflare Access, so firstly you need to authenticate.
How the end user experience looks like?
Each Cloudflare account has a default Cloudflare Access App Launcher page. You can change it to your own, but for the demo, we’ll use the default one. To see it, you can use this doc to find the default App Launcher URL.
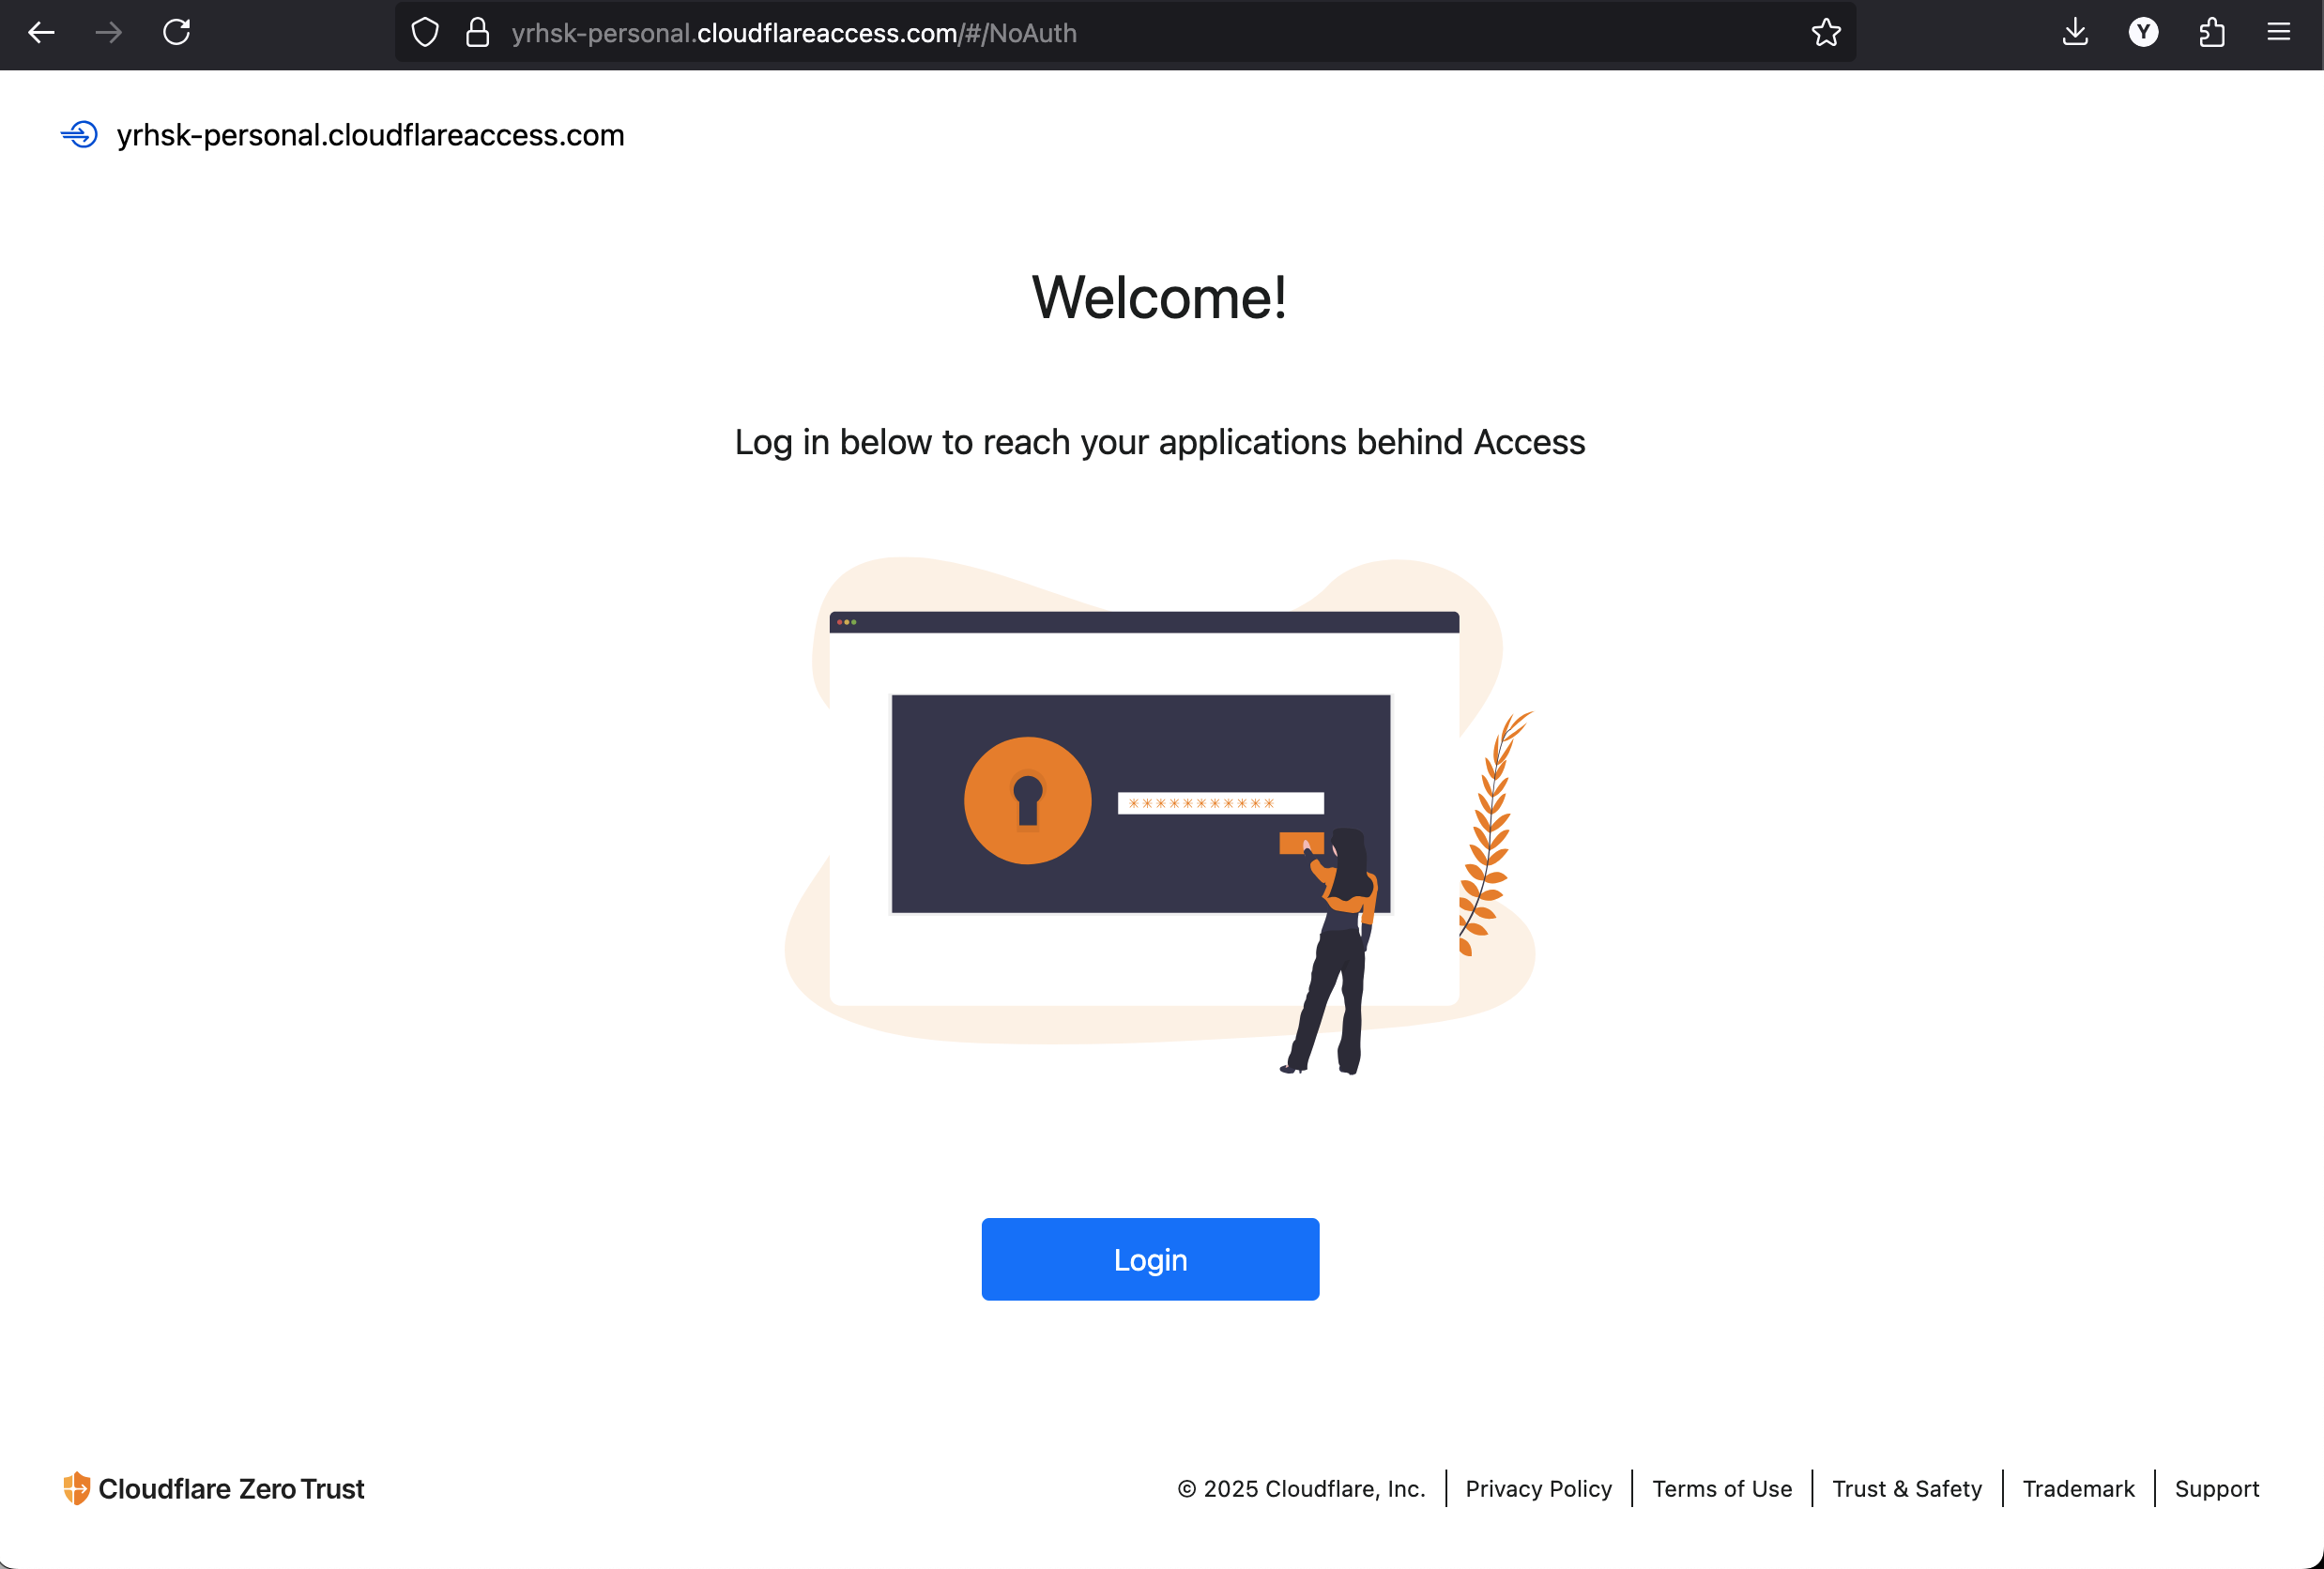
In my demo, authentication works via One-time PIN provider - code is being sent to the email address specified via access_allowed_email Terraform variable. If you’re trying to authenticate via email other than the one specified in the variable, you won’t be able to log in, Cloudflare will show a message “A code has been emailed to you.”, but the code will not actually be sent (that’s kind of a security feature).
After successfully authenticating, you will be redirected to the Cloudflare Access App Launcher page, where you can access the demo application:
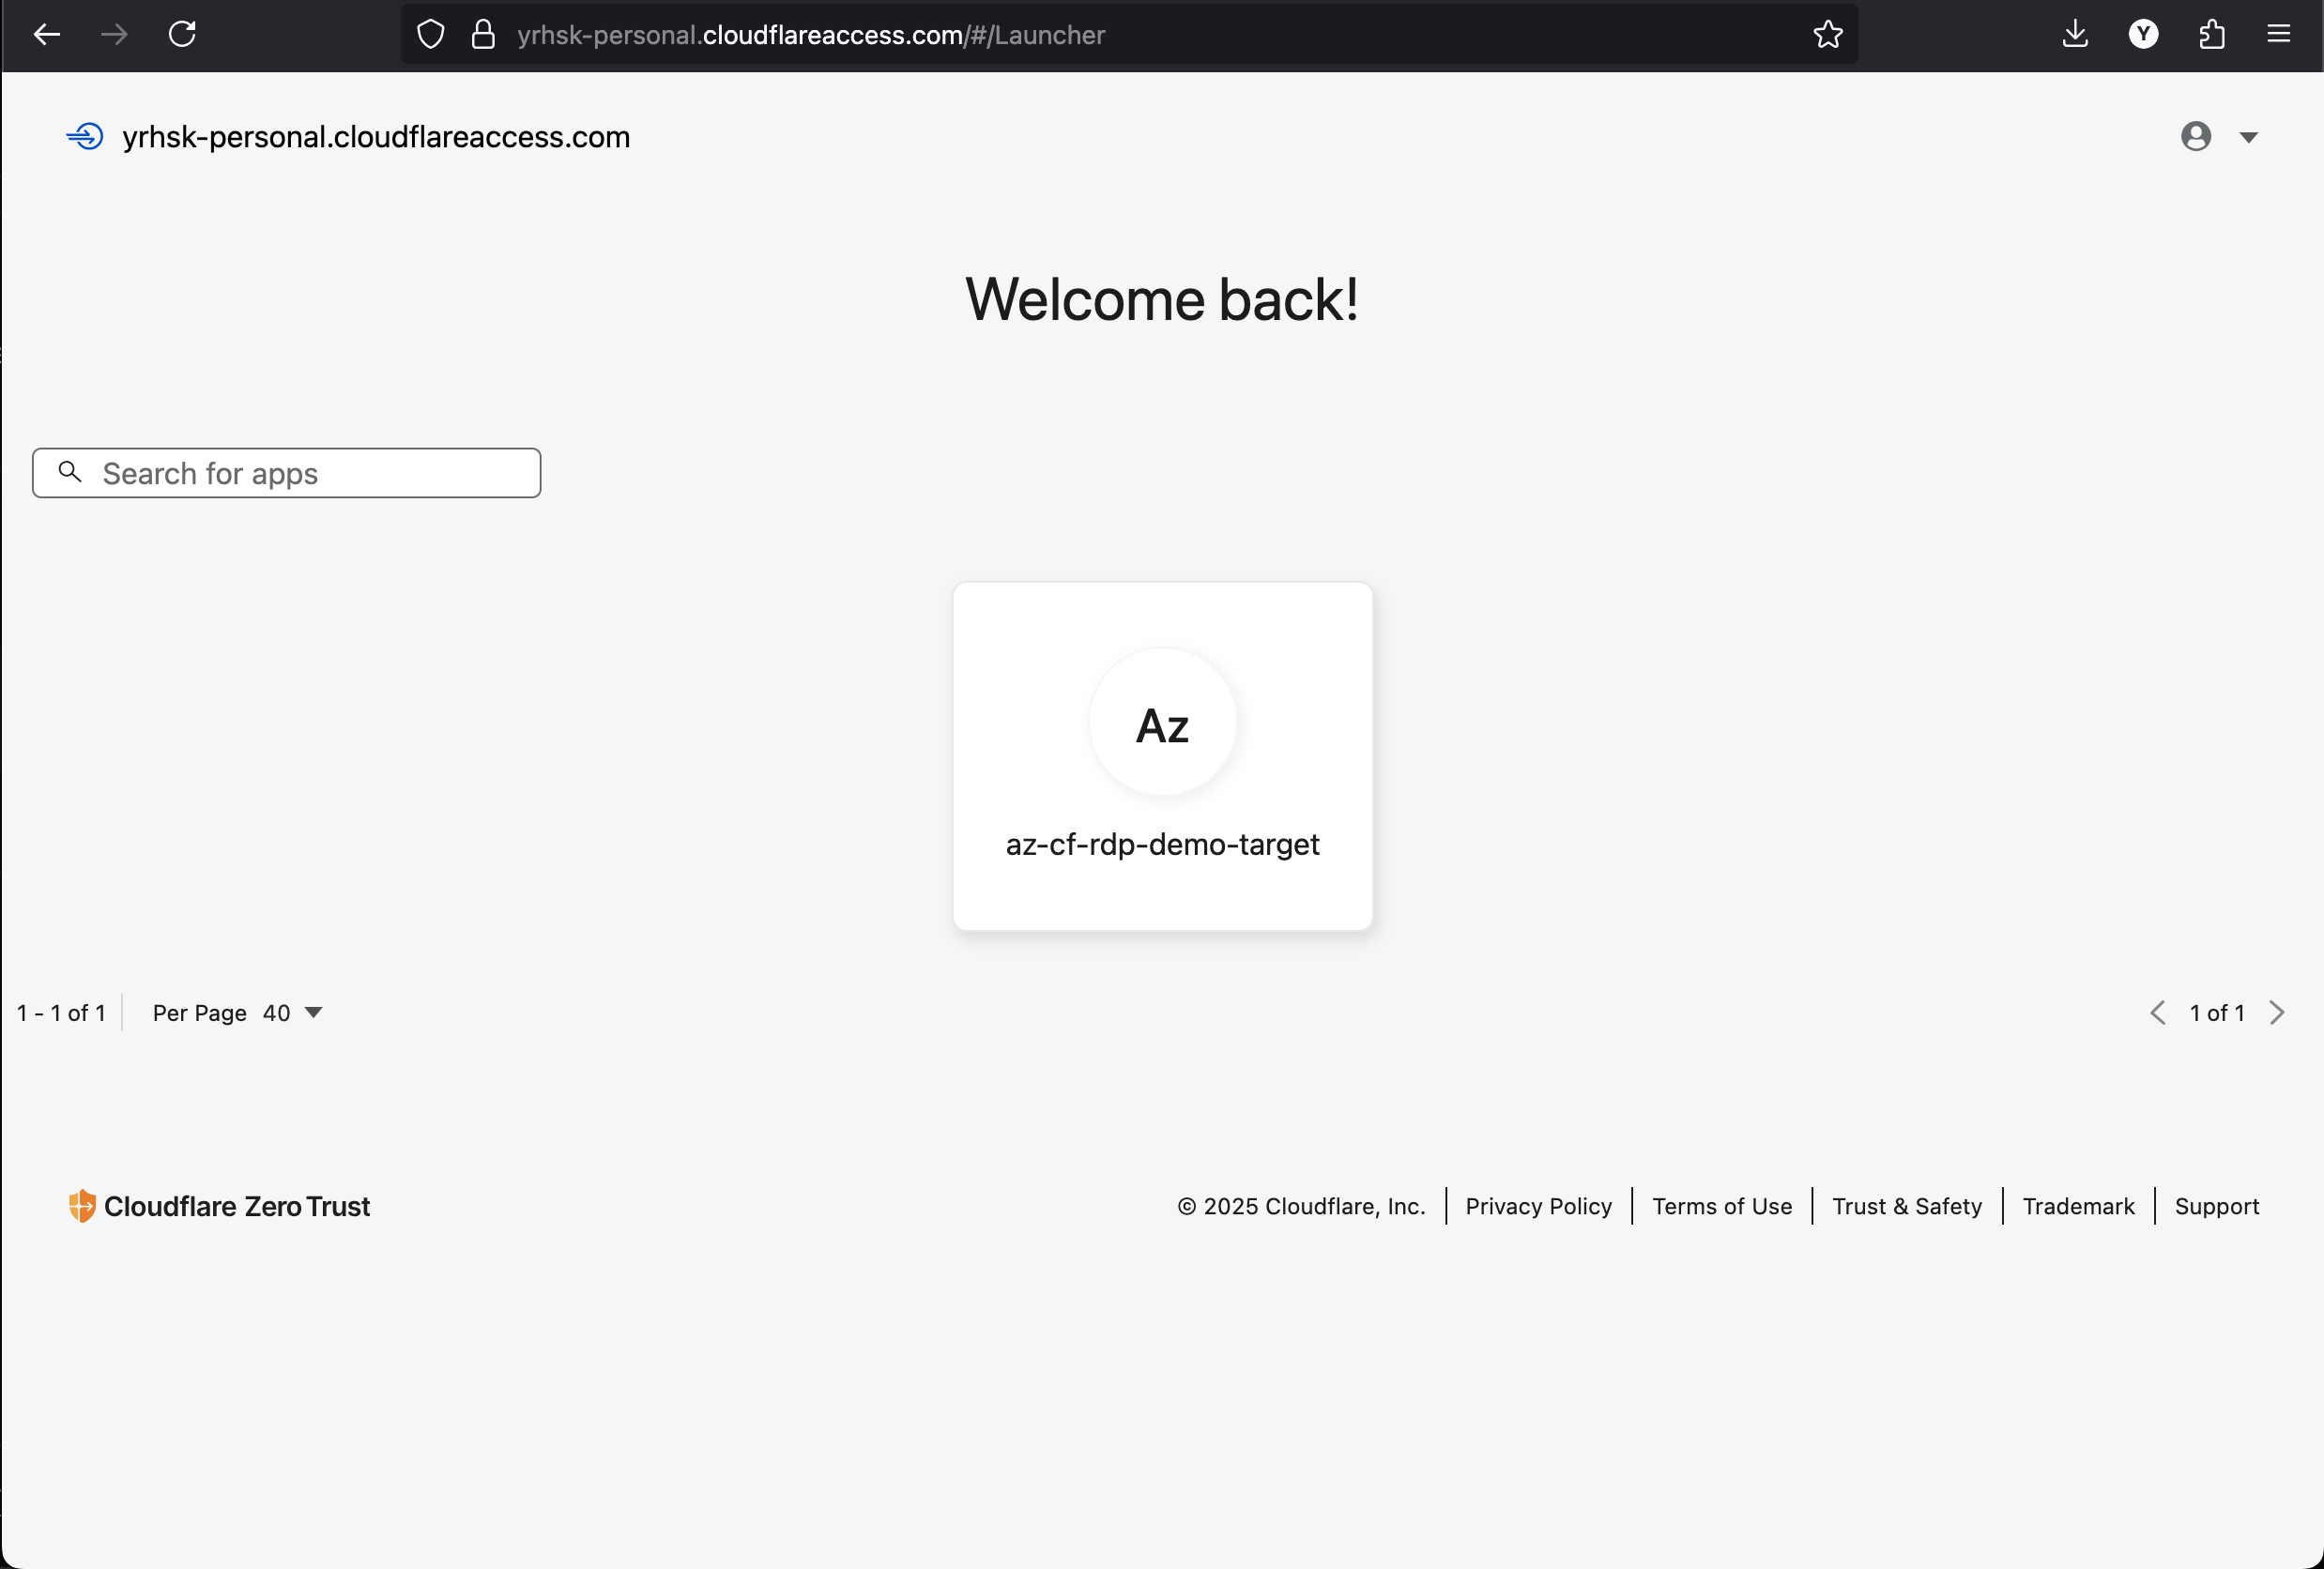
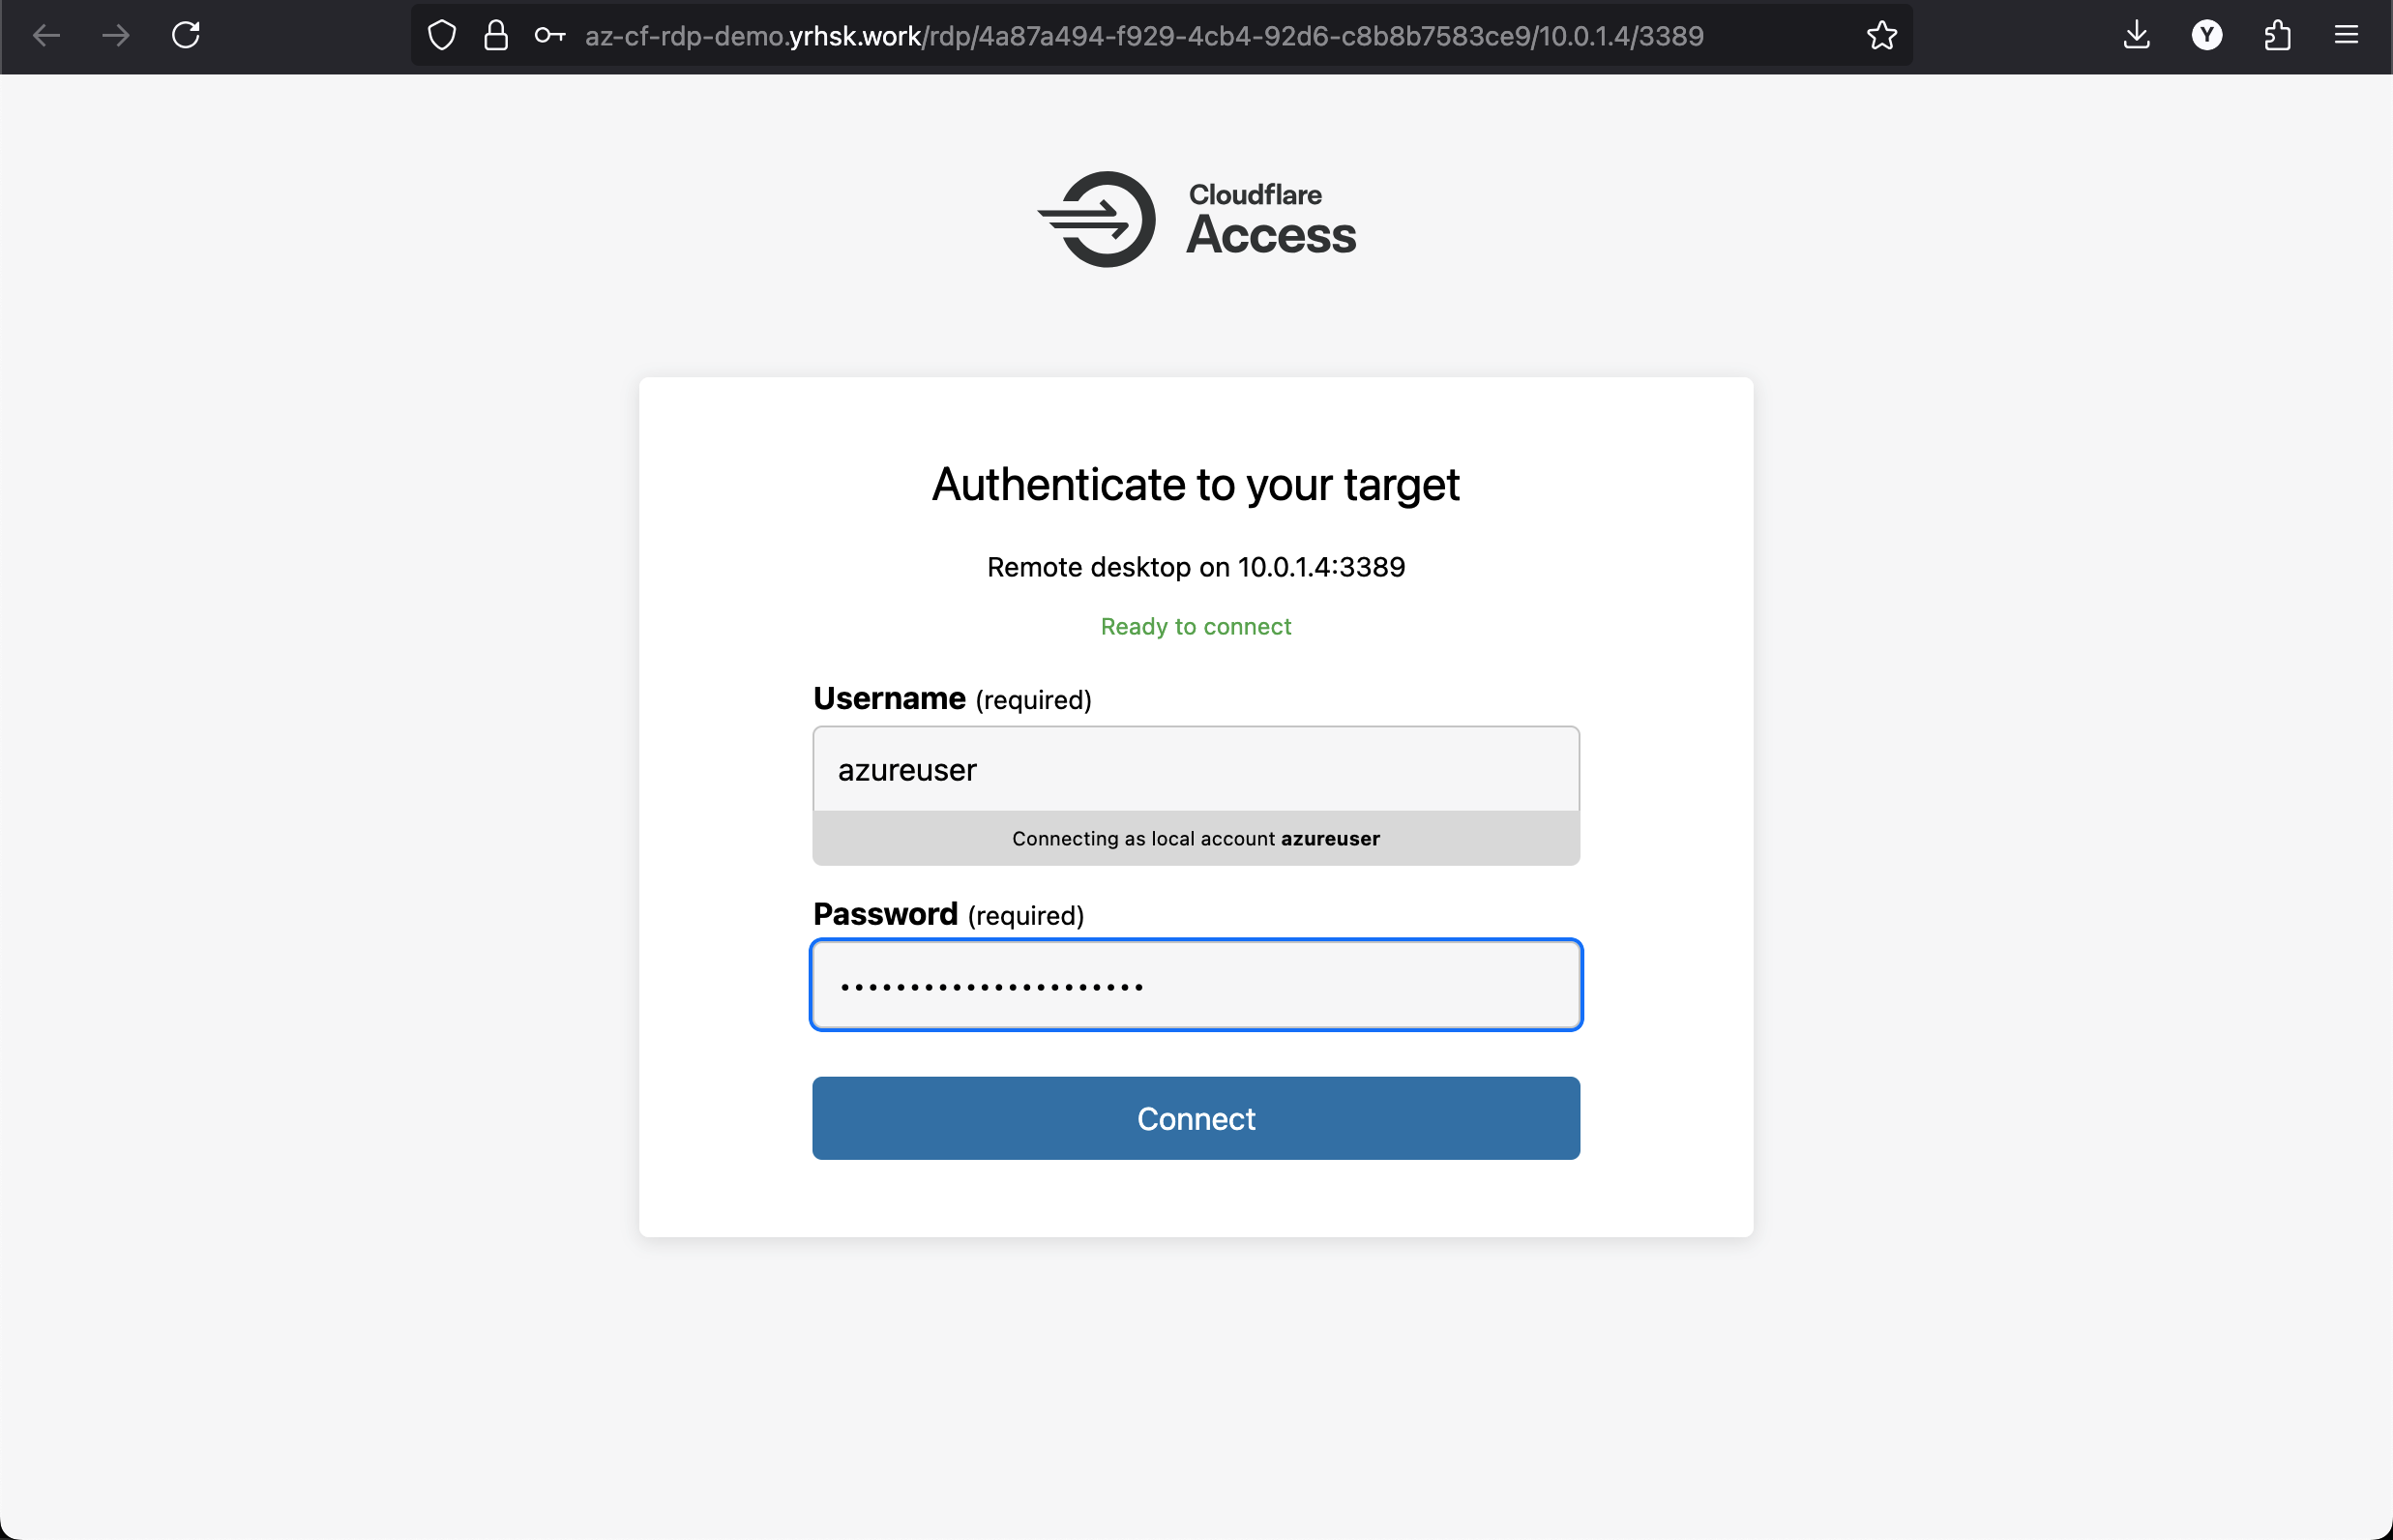
After pressing on the application tile, you will be taken to the RDP client interface, where you can enter the auto-generated username and password to access the Windows VM. Let’s take the data from our Terraform configuration output:

And paste credentials into the RDP client interface:
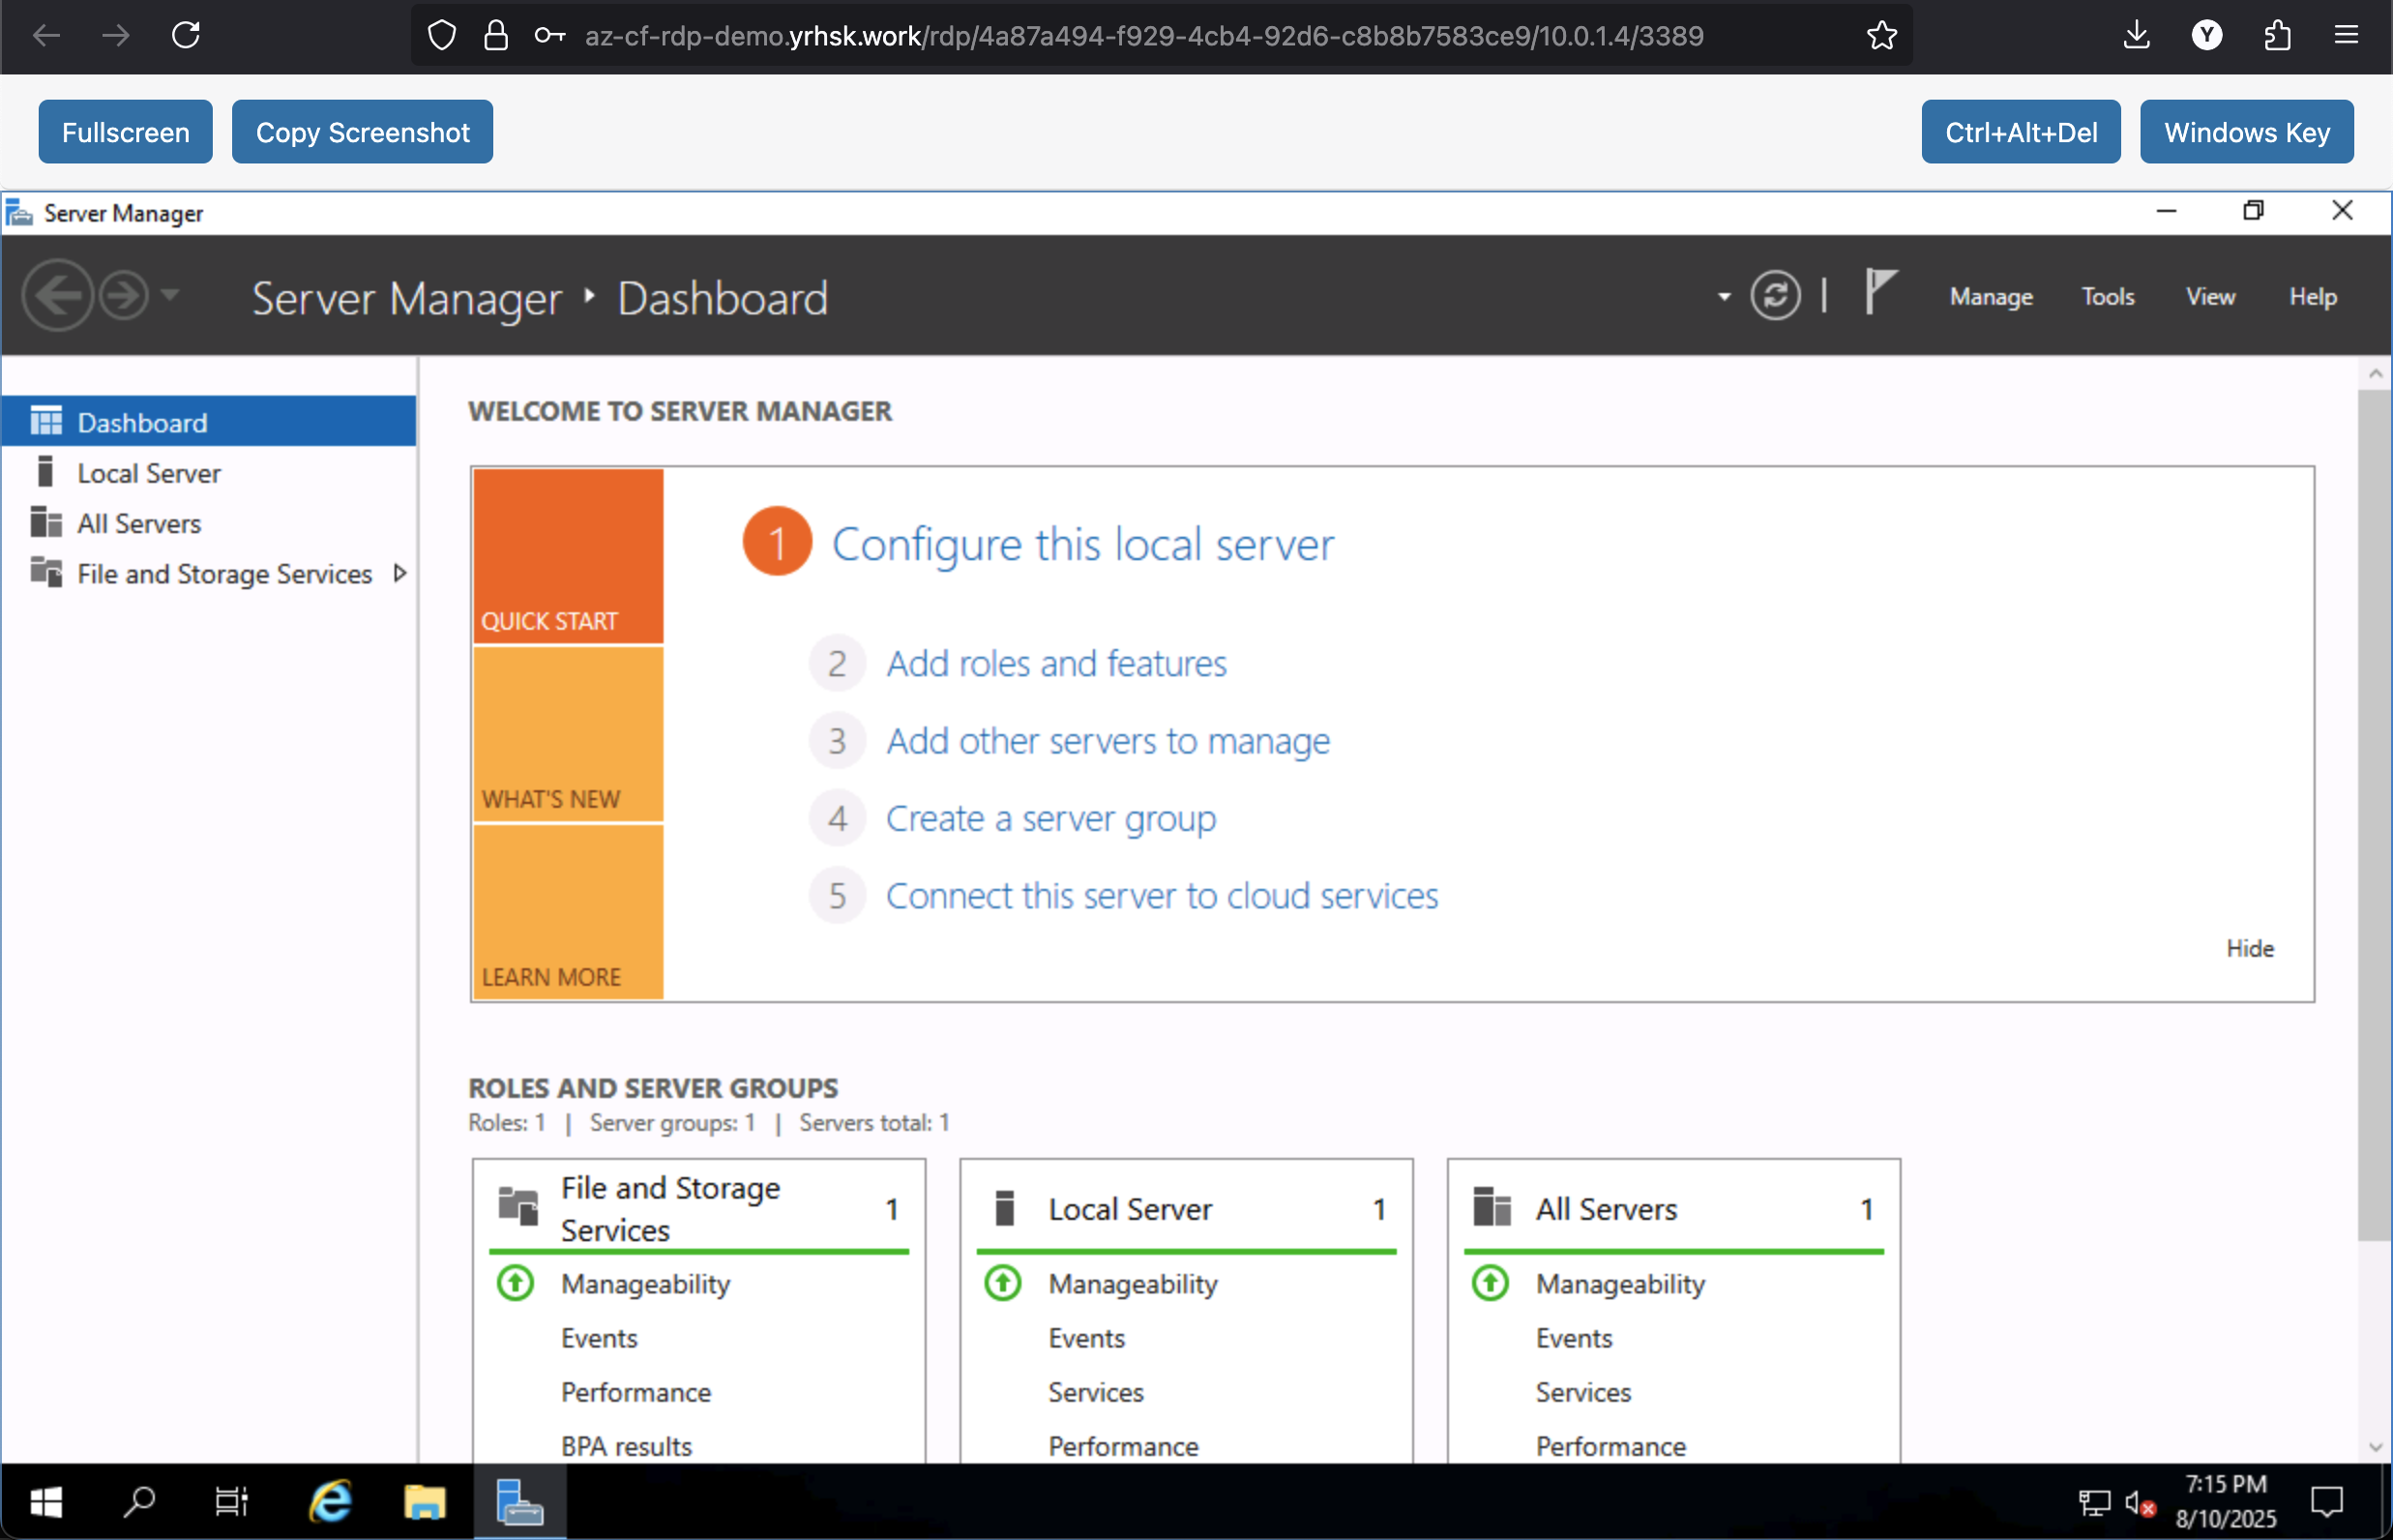
Voila! It works:
Limitations
It’s worth noting that Cloudflare in-browser RDP has some limitations, such as (at the time of writing):
- No file transfer (the most significant limitation)
- Clipboard size limited at 500 KB
- No audio support
Full list is described in the setup guide.
So for file transfer, you might need to use alternative methods. However, all other features should work as expected, and it’s amazing for the effectively free RDP via ZTNA that Cloudflare provides.